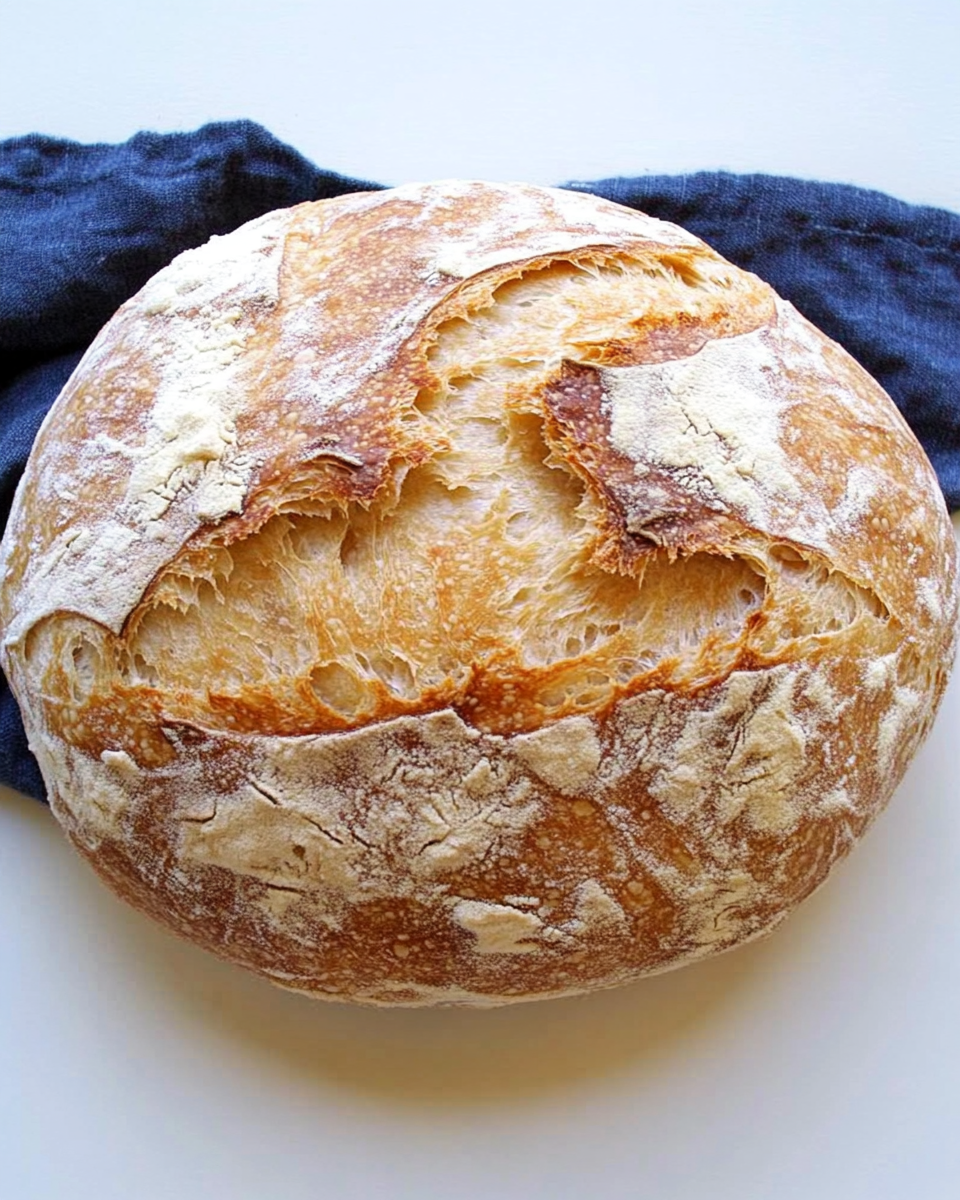
Few things are as comforting as the smell of fresh bread baking in the oven. This Rustic Crusty Bread is a masterpiece of simplicity, with a crisp, golden crust and a soft, airy interior. Perfect for pairing with soups, stews, or simply a pat of butter, it’s a recipe that elevates even the simplest meals. Made with basic pantry ingredients, this bread is approachable yet incredibly rewarding. Whether you’re an experienced baker or trying your hand at bread-making for the first time, this recipe offers a foolproof way to create an artisan-style loaf at home.
Full recipe:
Ingredients:
- 4 cups all-purpose flour
- 1 ½ cups warm water (110°F/45°C)
- 1 tsp active dry yeast
- 1 ½ tsp sea salt
- 1 tbsp olive oil
Directions:
- In a large mixing bowl, combine the warm water and yeast. Let it sit for 5-10 minutes until it becomes foamy.
- Add the flour and salt to the yeast mixture. Mix with a wooden spoon until a shaggy dough forms.
- Turn the dough out onto a lightly floured surface and knead for about 8-10 minutes until smooth and elastic.
- Shape the dough into a ball and place it in a lightly oiled bowl. Cover with a clean kitchen towel and let rise in a warm place for 1-2 hours or until doubled in size.
- Preheat your oven to 450°F (230°C) and place a Dutch oven inside to heat.
- Once the dough has risen, punch it down, reshape it into a ball, and let it rest for 30 minutes.
- Carefully remove the hot Dutch oven from the oven, place the dough inside, and score the top with a sharp knife.
- Cover with the lid and bake for 30 minutes. Then remove the lid and bake for an additional 15 minutes, or until the bread is golden brown and sounds hollow when tapped.
- Let the bread cool on a wire rack before slicing.
Prep Time: 15 minutes | Cooking Time: 45 minutes | Total Time: 3 hours (including rising time)
Kcal: 120 kcal per slice (approximate, based on 12 slices) | Servings: 1 loaf
Rustic Crusty Bread: A Timeless Classic
Bread has been a staple of human diets for millennia, and rustic crusty bread represents the pinnacle of traditional baking. This simple yet exquisite recipe brings the artisanal charm of bakery-style bread right into your home kitchen. With a few pantry staples and some patience, you can achieve a loaf with a golden, crackling crust and a soft, airy interior that rivals those of professional bakers.
Why Choose Rustic Crusty Bread?
- Simple Ingredients, Exceptional Results
Rustic crusty bread uses only four basic ingredients: flour, water, yeast, and salt. There are no preservatives, no additives, and no unnecessary fillers—just pure, wholesome goodness. The simplicity of this recipe is its strength, showcasing how a few high-quality ingredients can create something truly special. - A Bread for Every Occasion
This bread’s versatility is unmatched. Pair it with soups, stews, or salads for a hearty meal, or toast it with butter or jam for a comforting breakfast. Its chewy texture makes it ideal for dipping into olive oil or serving alongside a charcuterie board. Whether you’re hosting a dinner party or enjoying a quiet moment with coffee, rustic crusty bread is the perfect companion. - Nutritional Benefits
Homemade bread is not only more flavorful but also healthier than store-bought options. By making it yourself, you control the ingredients, ensuring no hidden sugars or preservatives. Bread made with whole-grain flour can provide fiber, and even all-purpose flour bread delivers carbohydrates that supply energy. For those with dietary restrictions, this recipe can be adapted to include gluten-free flour blends. - Therapeutic and Rewarding
Baking bread is more than just a culinary task—it’s an experience. The act of kneading dough by hand is meditative, and the scent of bread baking in the oven has a unique way of turning a house into a home. Watching the transformation from simple ingredients to a beautiful, golden loaf is incredibly rewarding.
What Makes This Recipe the Best?
- Perfect Texture Every Time
The hallmark of great rustic bread is the contrast between its crust and crumb. This recipe produces a crisp, crackly crust that gives way to a tender, fluffy interior. The secret lies in baking the dough in a preheated Dutch oven, which traps steam to create an environment that promotes the formation of a perfectly golden crust. - Beginner-Friendly
Despite its artisan appearance, this bread is surprisingly easy to make. There’s no need for specialized equipment or advanced techniques. The recipe’s straightforward steps make it accessible to beginners, while experienced bakers can appreciate its foolproof consistency. - Adaptability
Rustic crusty bread is a blank canvas for creativity. Experiment by adding herbs like rosemary or thyme, seeds such as sesame or sunflower, or even mix-ins like olives or dried fruit. You can also tweak the flour blend to include whole wheat or rye for added depth of flavor.
The Tradition Behind Rustic Bread
Rustic bread has its roots in the countryside kitchens of Europe, where families relied on simple ingredients and time-tested methods to produce their daily loaves. Traditionally baked in wood-fired ovens, these breads were designed to be hearty and long-lasting. Today, modern adaptations like this recipe preserve the spirit of those ancient loaves while making them achievable in any home oven.
The term “rustic” itself refers to the bread’s unrefined, natural appearance. Unlike the uniform loaves found in supermarkets, rustic bread celebrates imperfections. Each loaf tells its own story, with unique cracks, bubbles, and golden hues that make it truly one-of-a-kind.
Tips for Success
- Use the Right Flour
All-purpose flour works beautifully for this recipe, but bread flour can be substituted for a slightly chewier texture. Experiment with half all-purpose and half whole wheat flour for added fiber and a nutty flavor. - Hydration is Key
The water-to-flour ratio in this recipe ensures a moist crumb and a robust rise. Always measure your ingredients carefully, and use warm water to activate the yeast properly. - Don’t Skip the Resting Period
Allowing the dough to rise is essential for developing flavor and texture. The first rise builds the dough’s structure, while the second resting period after shaping allows the gluten to relax, leading to a more even bake. - Score the Dough
Scoring the top of the dough before baking isn’t just decorative—it controls how the bread expands in the oven, preventing unwanted cracks. Use a sharp knife or a bread lame to make quick, clean cuts. - Let It Cool
While it’s tempting to slice into fresh bread immediately, letting it cool ensures the crumb sets properly and doesn’t become gummy. Patience is part of the process!
What You’ll Love About This Bread
- Homemade Artisan Feel: Impress your family and friends with a bread that looks and tastes like it came from a high-end bakery.
- Affordable: Making bread at home is far cheaper than buying premium loaves, and it’s made with ingredients you probably already have.
- Customizable: This recipe is endlessly adaptable, making it suitable for sweet, savory, or dietary-specific variations.
Rustic Crusty Bread in Your Kitchen
There’s something magical about creating bread from scratch. In a world where convenience foods dominate, taking the time to bake your own loaf feels like reclaiming a piece of tradition. Rustic crusty bread connects us to our ancestors, to the art of slow food, and to the joy of sharing something homemade.
Conclusion
This recipe is more than just a set of instructions—it’s an invitation to slow down and savor the process. Whether you’re a seasoned baker or someone who’s never made bread before, this rustic loaf will inspire confidence and delight in your kitchen. With these insights and tips, your website article will provide a rich, engaging story that goes beyond the recipe itself. It celebrates the art of bread-making, making readers feel confident and excited to try it themselves!


